


CB350 Repairs
Before my recent trip to North Carolina I had pulled the motor out of Old Faithful to correct some oil leaks that had cropped up. The leaks did not affect compression and were not very bad. I rarely had to add a cap full of oil to make up for it, but it did make a mess on the outside of the motor. I found a gasket set on eBay and out came the motor. It got a thorough cleaning, along with the gritty, oily frame. I was impressed by the almost new condition of the cam and interior parts as I disassembled the little engine. I took it down to the head; all leaks originated above there. While apart I cleaned all the carbon off the heads and pistons and it all went together nice and shiny. I also took the opportunity to do a careful valve adjustment before putting it back in.
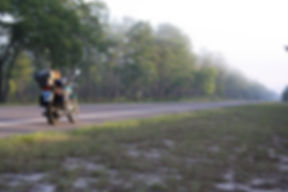
A Clean CB350 Motor, Ready for Reassembly

When I did the engine work, I had meant to pull the rotor and repair the starter clutch. I have been kick starting Old Faithful since before my Michigan ride, over a year ago, so I bought a repair kit with the intention of restoring the electric start. However, when I took the starter apart, I found it full of crud and the starter clutch turning as it should. I cleaned the starter, blew it out with compressed air, and put it back together, hoping for the best. The first test of the starter proved more was wrong than the crud in the starter, but the oil was in now, and I was not willing to drain it and take everything apart again, when kicking the motor was so simple.
I rode the bike for quite a few miles before the trip, and it stayed clean and oil-free on the outside. Alas, on the trip north, I noticed the oil starting to decorate the engine again. It never became anything but a nuisance, and again, never required more than a cap full of oil from time to time.
Now home, and after a bout of issues with the Savage's carb again, the Suzuki was running. Having something else to ride, I now turned my attention to the CB. Other issues have cropped up and I figured I might as well address them as well.
I had been heard a clunking sound coming from the bike ever since I returned from North Carolina. I stopped and jumped up and down on the suspension to see if I could find it, but to no avail. I rode to a Cub Scout picnic 15 miles away or so recently with my son on back and we clunk, clunk, clunked all the way there. I knew the sound was not coming from the engine but was frame or suspension related as I could hear it clearly every time I crossed a railroad track or hit a more serious road bump. At the picnic I decided to have a closer look and discovered the source of the sound—all the buzzing of the North Carolina trip had caused a stress fracture across the rear mounting ear of the chain guard. Looking closer I saw that not only was the guard broken, but the front attachment bracket was broken free of the swingarm.
I had been given a little 110 volt arc welder by a friend a couple years ago. I had welded a very little bit and that was over twenty-five years ago, so I might as well have had no experience at all. I called my father-in-law, Ronnie, who has on occasion welded stuff back together, and asked him if he would come up and lend a hand with the bike. We rolled the CB out into the sunlight in front of the garage, and while I cleaned up the areas to be welded, Ronnie got the welder set up. Ronnie took the first go at getting it welded, but he could not see through the cheap welding mask that had come with the little welder, and the weld to the bracket didn't hold. I decided there was no time like the present to try my hand again at welding, and with Ronnie manning a quartz shop light aimed at the area, I gave it a go. After several attempts the bracket seemed to be holding, so I turned my attention to the thin chromed guard, clamping the parts together on one side with a pair of vice-grips while welding the other end. With that end holding on its own, the vice-grips were removed and I did a serviceable job on the other end of the crack. Taking the guard out to my woodshop I used my grinder to flatten the weld. A little Strong Arm followed by black paint from a rattle can and the bracket was protected from rust. I bolted it back on.
I pulled the tank yesterday with a plan to address the oil leak. It looked like the leak was probably only coming from the cam case cover. I removed the top engine mount and all the acorn nuts with their washers from the eight cover bolts. I had cleaned the head and cam case pretty thoroughly and was fairly convinced that the leak was only at the cover, so back on went the nuts and washers and out came my torque wrench. Set to 14 ft lbs I carefully torqued them all down in the pattern described in my manuals. Once torqued, I started over and found that using the same setting, the bolts now could torqued ever so slightly again before the wrench clicked telling me I had found the right amount again. I also made sure the four screws holding the case to the head were torqued correctly. Hopefully, this will solve my leak. If not, I will have to pull the motor again, which I am not willing to do over such a minor inconvenience. If the cam case cover is not the culprit, then I will live with the leak for the time being.
Next up I will be addressing the starter clutch. It will be easier to do with the engine in as compression will aid me in removing the rotor. The rotor requires a special tool for removal; an armed puller will damage the rotor. I found a puller at Motion Pro that is said to work on the SL350, which should be the same as my CB350; at least the parts breakdown shows the same rotor part number for both bikes, and my manual includes the SL along with the CB and CL. I don't know why Motion Pro does not list the CB350 for the tool, but I will soon find out whether it will work. It was only a eighteen dollar tool, so not a big gamble. I am sure the Honda part is no longer available, and if it were the cost would far exceed the cost of the Motion Pro tool.
First, I will need to drain the oil. My used oil pan is full to the brim now after changing the car's oil last weekend, so after a run to the auto parts store to dump the oil I will start the process.
To be continued...
"Ride Your Own Ride."
Road Dog


